Think of your AC like your car. You wouldn’t drive 50,000 miles without an oil change. Yet most homeowners in Pasadena, Glendale, and Altadena never touch their HVAC system until it breaks down — usually on the hottest day of the year.
Here’s the thing: a single professional tune-up in spring can dramatically reduce your risk of a summer breakdown. And most of the items on this checklist? You can knock them out yourself on a Saturday morning.
Best time to do this: March through May — before Pasadena temperatures climb past 90°F and HVAC technicians get fully booked for the season.
Why Pasadena & Glendale Homeowners Need to Be Extra Careful
Most AC maintenance advice is written for “average” climates. Pasadena is not average. NOAA records show the city hitting 103°F in 2025 — and summer temperatures regularly exceeding 100°F. That means your AC works harder, longer, and under more stress than systems in cooler parts of the country.
In Altadena, the foothill location adds extra heat load. In Glendale, wildfire smoke season can clog filters faster than normal. One preventive visit before the heat arrives is worth ten emergency calls in August.
Step 1: Replace or Clean the Air Filter
✅ DIY — Takes 5 minutes
This is the single most important thing you can do for your AC. A clogged filter restricts airflow, forces the system to work harder, drives up your electricity bill, and can cause the evaporator coil to freeze.
For Pasadena and Glendale homeowners, the U.S. Department of Energy recommends changing filters every 1–3 months — but during peak California summer, consider every 4–6 weeks, especially if you have pets or live near a wildfire-prone area.
- 1-inch standard filters: Replace every 4–6 weeks in summer
- MERV 11+ filters: Essential during wildfire smoke days (recommended by Pasadena Public Health Dept)
- Cost: $5–$30 per filter
Step 2: Clean the Outdoor Condenser Unit
✅ DIY — Takes 20 minutes
The condenser is the big box sitting outside your house. Over winter and spring, it collects leaves, dirt, cottonwood fluff (especially in Altadena), and debris. All of that blocks airflow and makes the unit work harder.
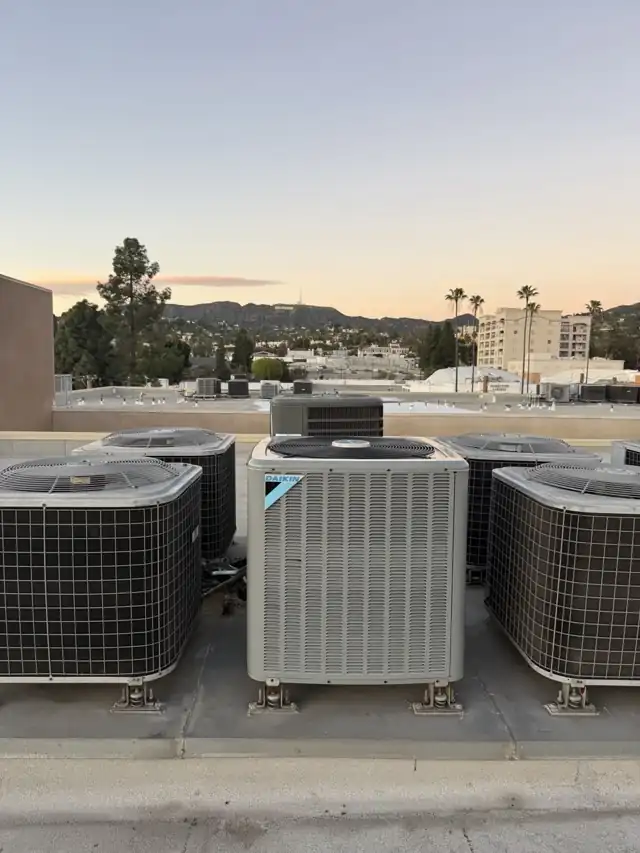
- Turn off power at the breaker
- Remove any leaves or debris around the unit — maintain 2 feet of clearance on all sides
- Gently spray the fins with a garden hose from the inside out (never a pressure washer)
- Straighten any bent fins with a fin comb ($10 at hardware stores)
- Check that the unit sits level on its pad
Step 3: Check and Clean the Condensate Drain Line
✅ DIY — Takes 10 minutes
Your AC pulls moisture from the air — that moisture drains through a small PVC pipe near the indoor air handler. If it clogs with algae or mold, water backs up into your home, potentially causing water damage and mold growth.
The fix: pour a cup of white vinegar into the drain line access port every 3 months. It kills algae and keeps water flowing freely.
Step 4: Inspect and Test the Thermostat
✅ DIY — Takes 5 minutes
Set your thermostat to COOL mode and drop the temperature 5°F below the current room temperature. Cold air should start flowing within 10 minutes. If not, or if there’s a significant gap between what the thermostat reads and actual room temperature, it may need recalibration or replacement.
Worth considering: upgrading to a smart thermostat. Southern California Edison offers rebates on qualifying smart thermostats, and the right settings can cut your cooling costs by up to 10%.
Step 5: Inspect All Vents and Registers
✅ DIY — Takes 10 minutes
Walk through every room and check that all supply vents are open and unobstructed (furniture, rugs, and curtains are common blockers), return air vents are clear, and vents are clean — vacuum them if dusty. Blocked vents force the system to work against pressure, wasting energy and stressing the blower motor.
Step 6: Check Refrigerant Lines for Insulation
✅ DIY visual check — Repairs require a pro
Look at the copper pipes running from your outdoor unit into the house. They should be wrapped in foam insulation. If the foam is cracked, missing, or falling off, the refrigerant lines lose efficiency. Replacing foam insulation wrap costs about $10–$20 at any hardware store and takes 15 minutes.
Step 7: Schedule a Professional Tune-Up
🔧 Pro required — $80–$200 typically
Even if you’ve done every DIY step above, a professional technician can do things you can’t: check refrigerant levels (requires EPA 608 certification), test capacitors and electrical connections, measure temperature differential across the coil, lubricate fan motors, and verify the system meets California Title 24 efficiency requirements.
Pro tip: Book your tune-up in March or April — technicians offer better availability and sometimes off-season pricing in spring, before the summer rush hits.
The Maintenance Schedule at a Glance
- Every 4–6 weeks (summer): Change air filter
- Every 3 months: Flush condensate drain with vinegar
- Every spring: Clean condenser, check vents, test thermostat, inspect refrigerant line insulation
- Once a year (spring): Schedule professional tune-up
- Altadena & Glendale bonus: Add a fall tune-up — foothill heat extends into October
Don’t Forget California Rebates
If your AC is over 10 years old, a tune-up might reveal it’s time to think about replacement. Before you do — check for rebates. SoCal Edison (SCE) and LADWP both offer rebates on high-efficiency HVAC systems. Some incentives can offset $500–$2,000 of the cost of a new system.
Bottom Line
A spring AC tune-up in Pasadena or Glendale isn’t just good practice — it’s almost mandatory given how hard the summer heat pushes these systems. Spend an hour now, and you’ll spend the summer actually comfortable instead of waiting for an emergency service call.
Your AC doesn’t ask for much. A clean filter, a clear condenser, and one professional checkup a year. That’s the deal.
Sources: U.S. Department of Energy (energy.gov) · Southern California Edison (sce.com) · LADWP (ladwp.com) · California Energy Commission (energy.ca.gov) · NOAA/Extreme Weather Watch · Pasadena Public Health Department